User invitation: create a new account
If you are a new user and you have received an ESL invitation, then you can accept your invitation and create your ESL user account by following the steps outlined in this section User invitation - create a new account.
Receive e-mail invitation
Your delegated authoriser or the Education Service Desk will send an email invitation for you.
You will receive an e-mail invitation – make sure the invitation is for you.
If it is for you click on the link in the email to set up your ESL user account.
We recommend you use your personal email address for your ESL user account to ensure the privacy and security of your ESL user account. Do not use a shared email address for your ESL user account, as passphrases can be reset via your email account.

Accept invitation
You will be taken to the Education Sector Logon section Accept invitation for [Insert preferred name, insert family name].
You will have to answer a few questions, that ask if you are the person in the ESL email invitation and do you have an existing ESL account.
If you answer that you don't have an existing ESL account there will be a create new account button for you to select to progress to the Create account screen.

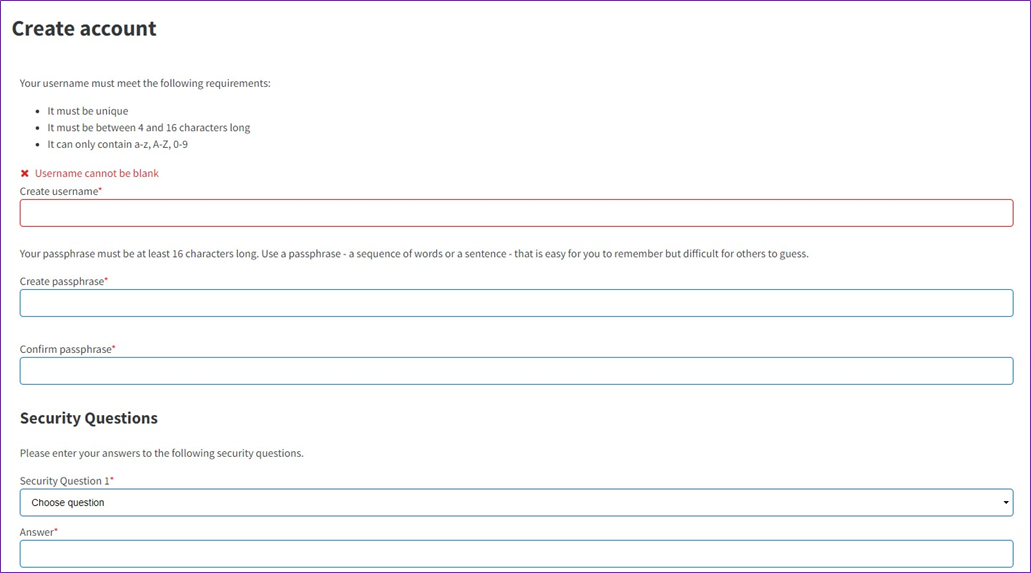
Create account
Once you have filled in all mandatory information you can select the Create button at the bottom of the Create account screen to submit your user account details.
Passphrase tips
Passphrases are a set of words that often have a space between them. They contain letters (often with numbers and symbols interchanged) that tend to add up to words - and even a sentence.
Your ESL passphrase does not expire. You can reset your passphrase through ESL self-service at any time.

Security questions tips
Security questions cannot have the same answer or be less than three letters. Security answers are not case sensitive.

Terms of Use
You must accept the Terms of Use to complete the invitation process and have your ESL user account created. If you choose to not accept the Terms of use your user account will not be created.
Once you have read the terms select the I accept button at the bottom of the screen.


Invitation completed
Once your ESL user account has been created and saved successfully you will be taken to ESL Self Service where you can see the details of your account.
If there are issues with access or details are wrong with your new ESL user account, contact your ESL DA if they set up your account. For further support please contact the Education Service Desk.

Logout
If everything looks okay with your new user account you should logout of your ESL Self Service session by clicking the Logout link in the top right of the screen.
